Zimmergren MOSS 2007 Tip #3: Publishing and displaying an InfoPath form in the browser
In this little tip I’m creating a Sample InfoPath form to be published to my Forms Library on my site and then opened within the browser when you want to edit/update the form.
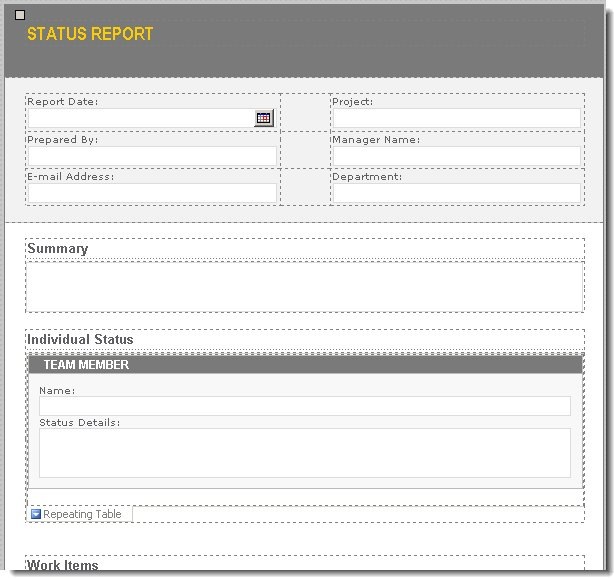
This is a sampleform from InfoPath:
Bring up the Design Checker (Tools – Design Checker), make sure you don’t have any errors. Then click the "Change Compatability Settings…" link to get the following dialog:
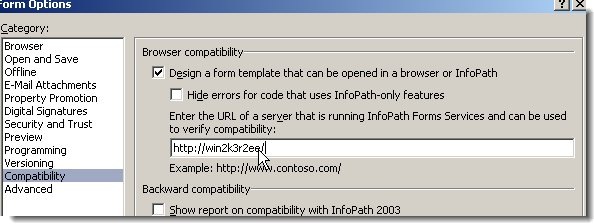
Make sure the "Design a form template that can be opened in a browser or InfoPath"-checkbox is checked, and enter the URL of your server with InfoPath Forms Services in the URL-field.
Next, you will Publish the form.
Choose "File" -> "Publish" and follow these steps:
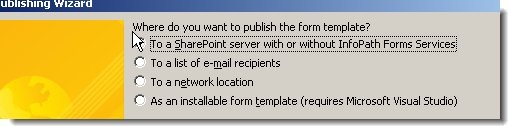
Make sure you enter the site where you want to publish the form (you will create a Form Library in following steps)

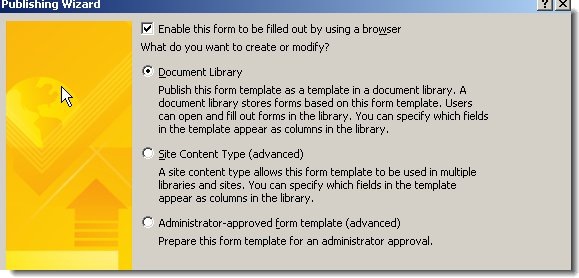
Just make sure the checkbox "Enable this form to be filled out by using a browser" is checked, and choose "Document Library" and click next.
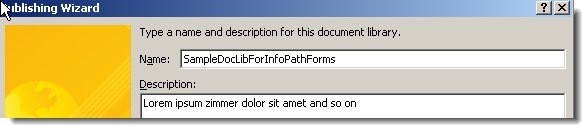
Choose to "Create a new document library" in order to create a new library to host the forms

Enter a name, and click next again..
Add the columns that should be availible in the SharePoint sites and Outlook folders (as the text says in the dialog):

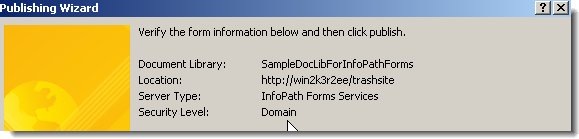
Just make sure the information in the next dialog is correct, then choose Publish to get your form published to your new Forms library!
Now the last thing you need to do is to go to the Form Library you just created, choose Settings -> Form Library Settings -> Advanced Settings and make sure you change the Browser-enabled Documents-setting to "Display as a Web page" in order to bring up the InfoPath form in your browser for editing (Not everyone have InfoPath installed on their machines)

That’s all you need to do! You now have a form that can be edited in the browser.
Next step is usually to connect a workflow to this library, so when a new form is filled out it will be sent to someone for approval or what not. Piece of cake with the built-in workflows. (Or developing one yourself in VS 2005/SPD)
I hope this enlightened someone.
Cheers, and happy eastern!


Recent comments