MOSS 2007: Customize the Search Result (using XSLT) - Part 3 - Customize using SharePoint Designer 2007
The third post in a series of customizing the search results for SharePoint (MOSS) 2007. These posts are by no means any in-depth articles on the subject, but rather a pointer to get you started on the journey. If there’s interest to create a more in-depth article series about the subject, don’t hesitate to contact me using the contactlink from my blog or leave a comment to this post.
Please refer to the previous articles if you have any questions about editing the xslt for your Search Result. They can be found here:
- MOSS 2007: Customize the Search Result using XSLT
- MOSS 2007: Customizing the Search Results Page (XSLT) – Part 2 – Add highlighting
Step by step
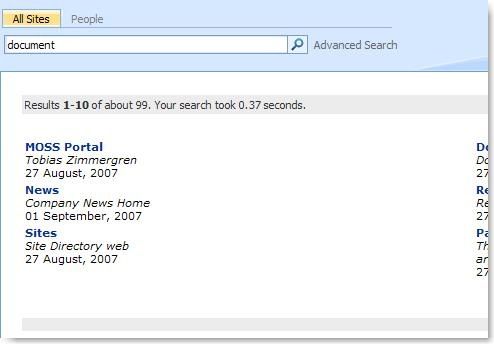
First of all, take a look at this picture to understand how it looks before the changes are done (this picture illustrates a standard-layout of the Search Core Results WebPart that is shown when you perform a search in the Search Center)
Modify the XSLT of the Search Core Results Web Part to get the raw XML
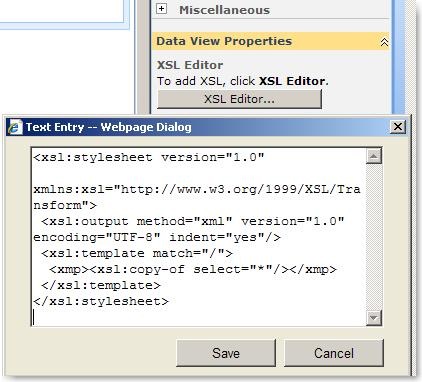
The search results are actually based on plain XML (which is why we can use XSLT to customize the appearance of the results to a high extent) so what we will do here is to basically use standard XSLT to get ALL the XML elements displayed in the search results as raw XML. This is done because we will use this raw XML in SharePoint Designer to generate some good looking XSLT markup for our Search Core Results Web Part.
Replace the existing XSLT markup from the Search Core Results Web Part with the following snippet (which basically just give us the raw XML output when searching):
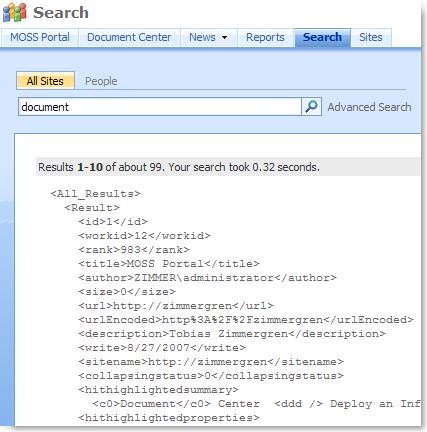
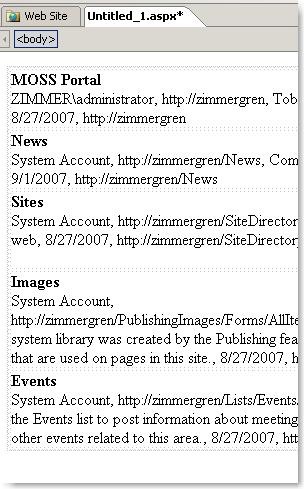
Now if you publish the page, you will see a result like the result in the following picure, which illustrates how the raw XML could look:
Make use of the raw XML that SharePoint generated for us in the Search Core Results Web Part
Copy all the raw XML data (including the <> tags and save to a new XML-file (I named mine rawsearchresult.xml)
When you’ve copied down the raw XML and saved the file, launch SharePoint Designer 2007.
Use SharePoint Designer 2007 to customize the XSLT for your Search Result Page
Launch Microsoft SharePoint Designer 2007 and open up your SharePoint site (by going to "File" – "Open Site.." and enter the url to your SharePoint site (in my case, it’s http://zimmergren and hit open)
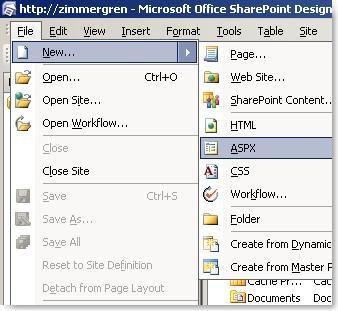
Next, choose File – New – "ASPX" to create a new ASP.NET page. Note that you do not need to save this page because we will only use the page as a base when we customize our XSLT using SharePoint Designer. Later, when we are satisfied with the presentation of our search results, we will simply copy the generated XSLT and close the new .aspx page and ignore the changes.
Now from the File-meny choose "Data View" – "Insert Data View" to insert a standard DataFormWebPart.
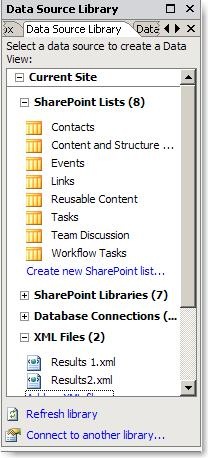
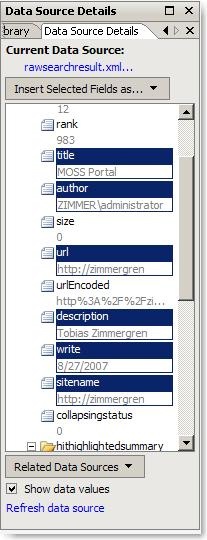
Note, when inserting the aforementioned Data View, the Data Source Library is opened/displayed in the top right pane (if you havn’t customized the appearance of SPD) as seen here:
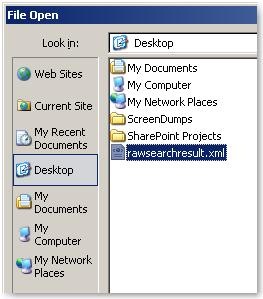
In this newly opened Data Source Library we will expand the node that says "XML Files" and choose "Add an XML file…". Browse to your XML file that contains the raw XML and hit okay.
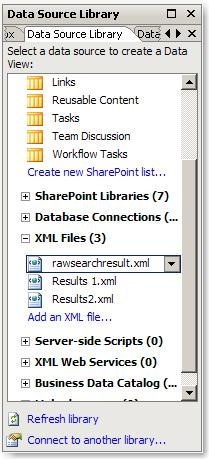
You will be confronted with a question asking you to import the file into SharePoint, press Ok. When you’ve hit OK until you’re back on the aspx-page, you will see your newly added XML file under the "XML Files" node in the tree in the Data Source Library and in my case it’s called rawsearchresults.xml.
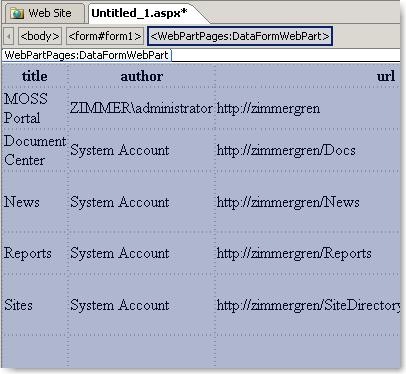
Click the dropdown of your file, and choose "Show Data". Next, choose the tags/entities that you want to include in the presentation of your Search Result by holding down Ctrl + clicking the ones you’d like to insert.
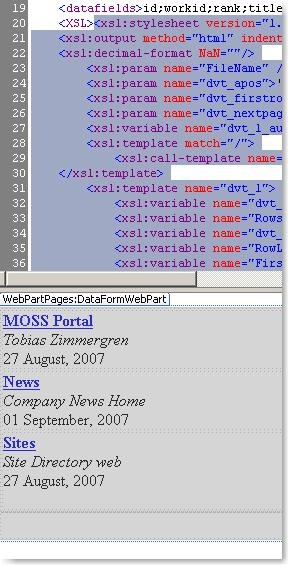
Simply drag and drop those items onto the DataFormWebPart on your ASPX-page and it will automatically render the XSLT for you, like so:
Now, either manually edit the presentation of your search results – or choose the quick edit for your DataFormWebPart and click "Change layout…".
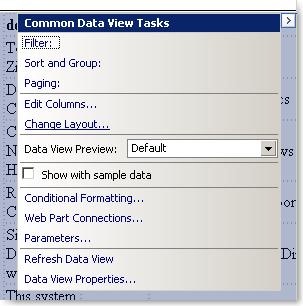
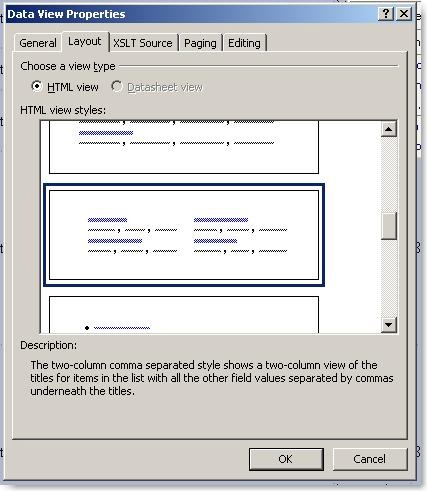
On dialog, choose your desired layout to base the presentation of your search results on.
When we’ve done this, SharePoint Designer automatically renders the XSLT for us (based on the XML File we chose, that contains our raw XML for the Search Results (which is also why we get the nice preview in SharePoint Designer))
Now, that might not be the best layout to use for displaying the search results on a page.. So we will have to do some manual tweaking in order to get the presentation of this XSLT to fully fit our needs and demands.
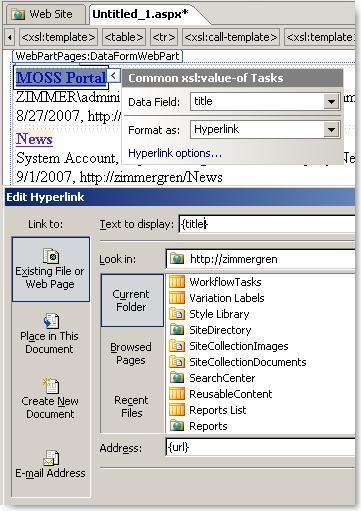
Something that is important to note is how we can e.g. change the title to become a hyperlink that links to the actual object by choosing the title-element and using the Quick Edit to change some properties. Note that I changed the title to a Hyperlink, which links to {url} that is part of the Search Result and also setting the title to {title} which also is an element in the Search Result.
Do all your manual tweaking (either by customizing the XSLT from the source view, or as the previous picture illustrated) and continue to the next step.
Tip: You can of course add Sorting, Filtering and Grouping aswell by simply choosing it in the same dialog that we chose to change the layout..
Use the XSLT that was rendered by SharePoint Designer 2007 in the Search Core Results Web Part
Switch to Split View or Source View, and copy the entire tag and all content.
Now simply paste the generated XSLT into your Search Core Results WebPart’s XML-section.
NOTE: If you can’t see the entire Web Part and thereby not being able to access the edit-button, you can simply enter the querystring: ?contents=1 which will take you to the Web Part Maintenence Page for your site, where you can delete the webpart, and then add a new one as usual, and edit the XSLT of the new Search Core Results Web Part instead.
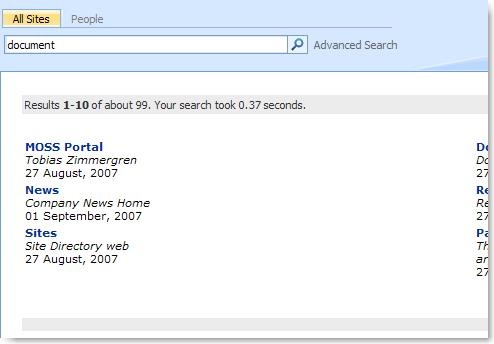
Publish the page, and behold your new presentation of the Search Results. Please note that I didn’t make any heavy customizations to my XSLT and therefore it’s rather steril, but you can make some major changes in the XSLT and in SharePoint Designer if you really want to customize the display of your Search Results.
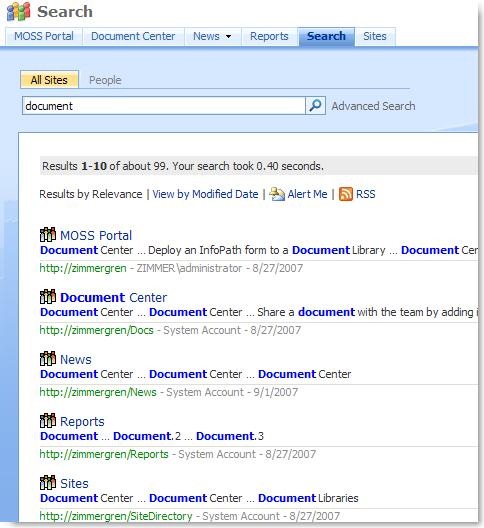
This is how my presentation of the Search Results look like:
I love feedback and comments :)
If you liked this article please leave a comment with feedback so I know that people read it, otherwise it’s boring to write these step by step illustrated articles.
Cheers, and good weekend.


%20-%20Part%203%20-%20Customize%20using%20SharePoint%20Designer%202007)
Recent comments